This Set Courses Web App is designed to help Race Officers to find easy ways to set up great courses for club races and Special Event Regattas at their home clubs. It includes a wide range of tools and information on the various pages (see the menu above). This home page provides various updates of the lastest information and advice. Enjoy!
Mini GPS Track Back Device - Easy way to estimate leg length!
Finally there is a relatively cheap and easy-to-use device for getting leg lengths for setting courses! The answer in my humble opinion is the Gerber Mini GPS Track Back Device for around $100. It is small, portable and very easy to use. Note, no endorsement is provided for this device, but it is worth considering. While GPS course plotters do the job, they are not available to all, and they can be very complicated and hard to use by volunteer course setters at small clubs. Google this device to learn more. It is the answer we, and many small clubs, have been looking for. See the Simple User Manual we developed
Indicative Course Length Guide for Keel Boats & Trailer/Sailers and for Dinghies
The following links provide indicative course length for desired elapsed times under various wind conditionsKeel Boats & Trailer/Sailers
Olympic Class Dinghies - Laser and 470 Class
Popular Links and Pre-Fills - UPDATE new Lat/Long DMM format & MAP Options!
Triangle => enter windward direction and select reach angle option
Triangle 60-60-60 Triangle 45-90-45 Triangle Universal => enter Reach Angle and Windward Beat LengthTrapezoid => enter windward direction, reach angle and leg length as percentage of Inner beat
Trapezoid-70deg-67%-100% Trapezoid-70deg-100%-100% Tapezoid Universal => enter First Reach Angle and Leg LengthsMark Lat/Longs from Your Location at the Bottom Mark (Reference Point) or an Entered Location
These tools show the lat/longs for all course marks in relation to a reference point.
You can use a geolocation tool (RefLoc) to get the lat/long for your on-station reference point (usually the Bottom Mark - Mark 3 for Triangle & Mark 4 for Trapezoid). [Scroll to the bottom of the page for instructions and examples]
Trapezoid LatLong DD format for Lat/Longs
Trapezoid LatLong - DMM DMM format for Lat/Longs
Triangle LatLong DD format for Lat/Longs
Triangle LatLong - DMM DMM format for Lat/Longs
Triangle LatLong Starboard DD format for Lat/Longs
Triangle LatLong Starboard - DMM DMM format for Lat/Longs
Note 1: Apps can be converted for distances in Nautical Miles, rather than metres by clicking the 'NM' button.
Note 2: The Geolocation tool is run at the reference point, that is the Bottom Mark => Mark 3 for Triangle Courses;
=> Mark 4 for Trapezoid Courses. Mark 1 is the Windward Mark.
MAP Options - Virtual GPS Unit for Laying the Marks
Note: Works with most phones, but Smartphone with GPS is best for accurate positions. Allow 6 seconds to hone in. Enter the Lat Long for the
Reference Location Mark 3 or Mark 4 (for Trapezoid) or use the Geolocation Tool set it for your location when you are at the mark.
Once the options have been entered a map will be displayed. Then, to set a mark, proceed in its direction
using the bearings shown below the map. Click the ShowMyLoc button to show your current position as a 'dot' on the map. Click it again to show your new position on the map. Drop the mark when you get there. A virtual GPS unit on your mobile. The options are:
Trapezoid DD Map DD format for Lat/Longs, MAP
Trapezoid DMM Map DMM format for Lat/Longs, MAP
Triangle DD Map DD format for Lat/Longs, MAP
Triangle DMM Map DMM format for Lat/Longs, MAP
Triangle Starboard DD Map Starboard DD format for Lat/Longs, MAP
Triangle Starboard DMM Map Starboard DMM format for Lat/Longs, MAP
How to Set Up Yacht Race Courses - Bearings and Back Bearings
The aim of this Web App is to provide tools to help race officers set up yacht race courses. While there is a vast array of information and guides for setting courses, most rely on complex tables to get the bearings and back-bearings for the buoy locations for triangle, trapezoid and other options. These bearings are essential, whether a GPS system or a bearing compass is used to determine the buoy locations. This site includes an array of pages for various course options. Race officers can choose their preferred course, enter the windward bearing, with or without a bias, and the tool will display the bearings and back-bearings for all the course marks. It also provides bearings for the start line, square to the windward direction, with and without a 5 degree bias to windward, at the port end. The site is web-optimized and the information displays well, on all screen sizes.
Shown below are examples of the information provided for a 60-60-60 Triangle and 60-120 Trapezoid course with a reach length that is 2/3 of the equidistant inner and outer beats.
60-60-60 Triangle Course
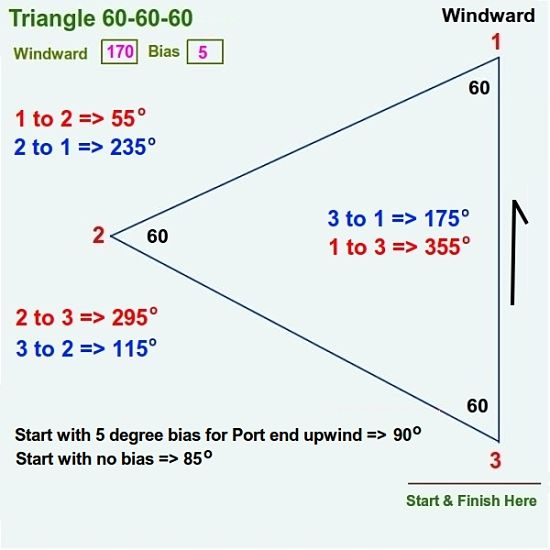
Shown above are the bearings and back-bearings for a Triangle course set at a 60 degree angle. The windward direction has been entered as 170 degrees, with a 5 degree bias to starboard. If the angles are right all legs are equidistant.
The bearing for the start line is also shown, with and without a 5 degree bias to windward at the port end. The bearings to the start and finish locations are not shown as there are too many variations. The modern approach is to have the start line below the bottom mark and to have a reach to the finish line after rounding the bottom mark. Single marks or gates can be used at the mark locations. The location of a windward separation or 'distance' mark, to keep yachts sailing upwind and downwind apart after roundings is also not shown.
Note that the bearing angles are only valid if the angles between the legs are 60 degrees. All the legs will be of equal length if the angles are correct, and the bearings displayed will apply for courses, with any leg length.
Using this information the course can be set using a bearing compass from the reference point at Mark 4. The buoy laying teams can also use the same set of bearings to set the 1, 2 and 3 Marks.
A Universal option is available for both Port and Starboard roundings.
Users need to enter the windward direction bearing and the angle for the equidistant reaches.
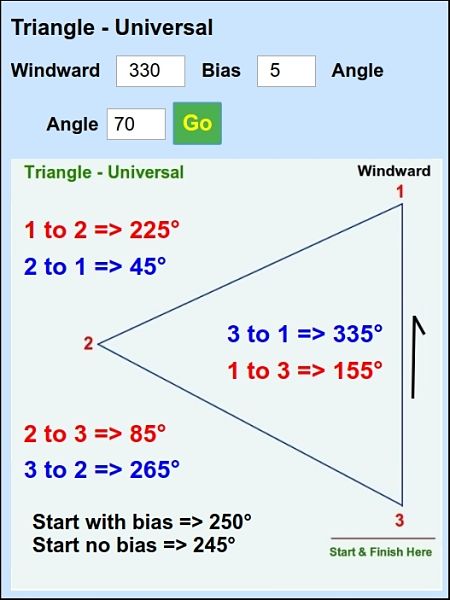
See the Triangle Page for the many options available, including starboard rounding courses and 45-90-40 Triangle courses.
Trapezoid Course Option Examples
60-120 Trapezoid Course with Reach 2/3 of Beat Lengths
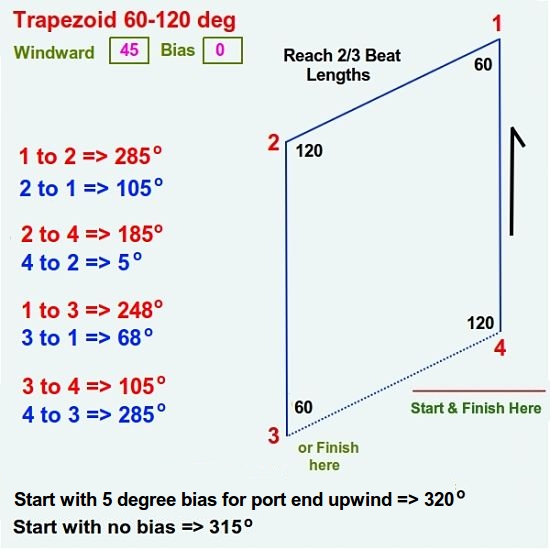
Shown above are the bearings and back-bearings for a Trapezoid course with the reach of 2/3 beat length, set at a 60 degree angle. The windward direction has been entered as 45 degrees, and there is no entered bias. The inner and outer beats are equidistant.
The bearing for the start line is also shown, with and without a 5 degree bias to windward at the port end. The bearings to the start and finish locations are not shown as there are too many variations.
Note that the bearing angles are only valid if the reach is 60 degrees and the inner and outer beats are parallel and of equal length. The reach length must also be 2/3 of the beat length.
Using this information the coarse can be set using a bearing compass from the reference point at buoy 4, or by working through the marks in sequence.
Tapezoid Universal
A Tapezoid Universal option is available for Trapezoid Courses. Users need to enter the windward direction and bias if applied. The reach angle must be specified. The distances for the Reach and Outer Beat need to be entered as percentages of the Inner Beat length. The pre-filled pages are easier to use.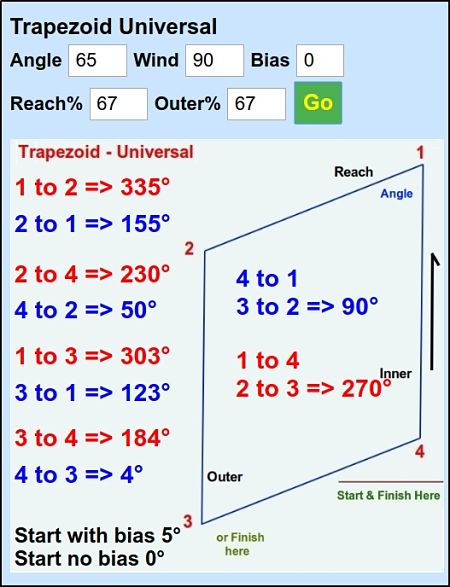
Mark Positions Lat/Longs
These universal tools show the lat/longs for all course marks from an entered location.
These positions can be entered as Waypoint into a GPS system.
This 'One-Click' process is easier than using bearings and distances to set the
buoys one by one using bearing tables. There is an option for clicking a 'Myloc' button,
which uses geolocation to input your current location Lat Long as a reference point, using geolocation.
There are Lat/Long tools for Triangle (Port & Starboard) and Trapezoid Courses.
Therefore, the Race Officer and/or the Mark Layer(s) located at the reference point (at the Bottom mark) can enter the information and get lat/longs for all the Course Marks.
The Mark Layer(s) can use their own GPS systems to go to each location and drop the marks.
Trapezoid LatLong
Triangle LatLong
Triangle LatLong Starboard
Triangle Lat Long Example

In the Triangle Lat Long example shown above, the Windward direction is 90 degrees with no bias. The 'Myloc' button has been clicked and the blue color of the 'Lat' & 'Long' labels has changed to blue and the message below shows 'Location loaded OK'. The 'Myloc' button is now green. When the 'Go' button is clicked the lat/longs for all the marks are displayed, as well as the bearing to the pin end of the start line. A Google Map shows the location of the Marks - you can zoom in and out to check their position in your locality.
Trapezoid Lat Long Example
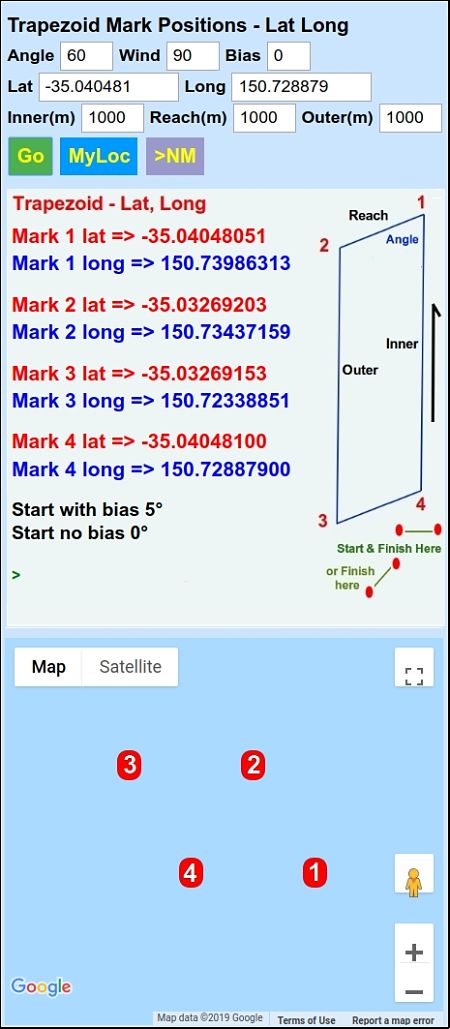
In the Trapezoid Lat Long example, shown above, the Windward direction is 90 degrees with no bias. The reach angle is 60 degrees. The 'Myloc' button has not be clicked and the lat long for the reference point (Mark 3) has been entered. The distances for the Inner and Outer Beats and the Reach have all been set as 1000 m. The 'Go' button has been clicked and the lat/longs for all the marks is displayed, as well as the bearing to the Port (pin) end of the Start Line. A Google Map shows the location of the Marks - you can zoom in and out to check the mark positions in your area.